
By Marissa Gallant and Suzanne Hauerstein
New England Botanic Garden at Tower Hill Staff
Bring the outdoors in and create your own sanctuary inside! Nature weaving is a great way to be creative and unwind. This simple craft project teaches children mindfulness and relaxation and can be done with everyday items you have at home. Mindfulness activities have been shown to reduce depression, anxiety, and ADHD in children. These projects build resilience, promote dexterity, help build fine motor skills, and provide an outlet for children to cope with stress and engage with the natural world.
Try the simple techniques below to learn the basics and challenge yourself by trying new stitches or creating larger masterpieces. To begin, grab a bag, head outside, and start collecting your materials including leaves, feathers, sticks, grasses, dried flowers, and anything you or your child finds unique and interesting.
You will need:
• Twigs
• Assorted natural items
• Cardboard
• Scissors
• Pencil
• Yarn
• Masking or painters’ tape
• Ruler
Once you have gathered your supplies, follow the simple steps below to start the nature weaving process!
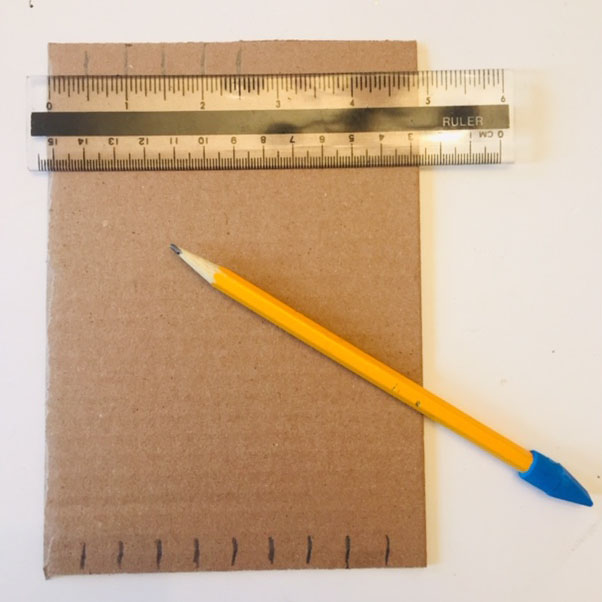
Begin by creating a cardboard loom. Cut a piece of scrap cardboard to measure approximately 5 inches by 7 inches. Orient the cardboard so the 5 inch sides serve as the top and bottom. Use your ruler to measure nine equally spaced 1/2 inch lines along the top and bottom and cut along each mark.
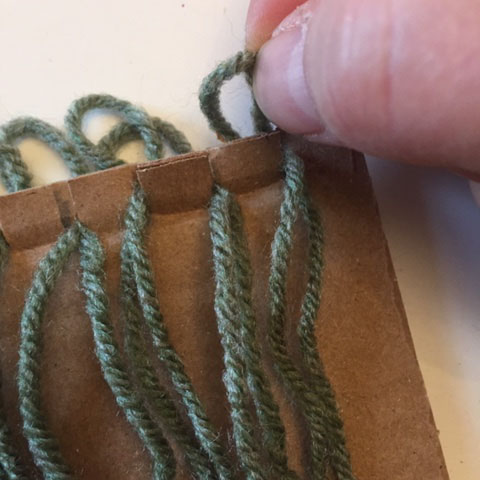
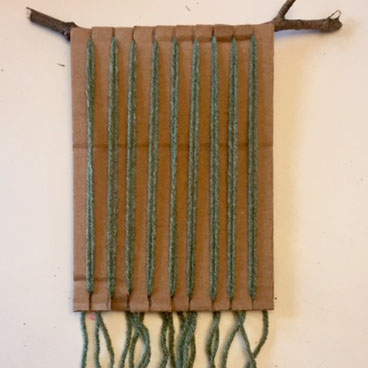
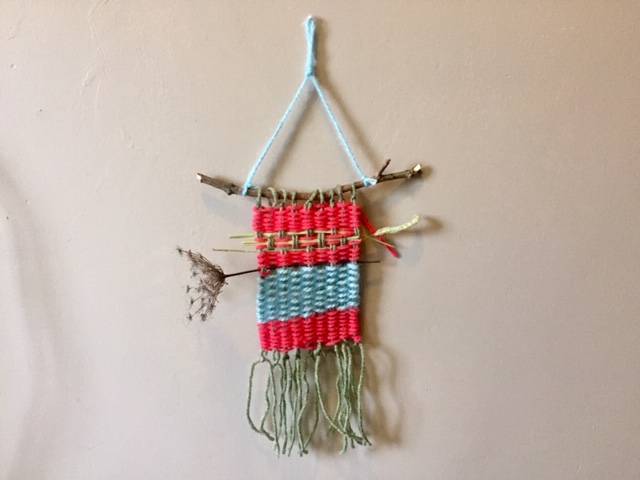
Thread your twig or stick through the top loops and tie a knot on the front side of the cardboard at the top of each piece of yarn. Tuck the opposite end of each yarn piece into the slits at the bottom of your cardboard loom and tie a knot on the backside of the cardboard. Now you are ready to weave!
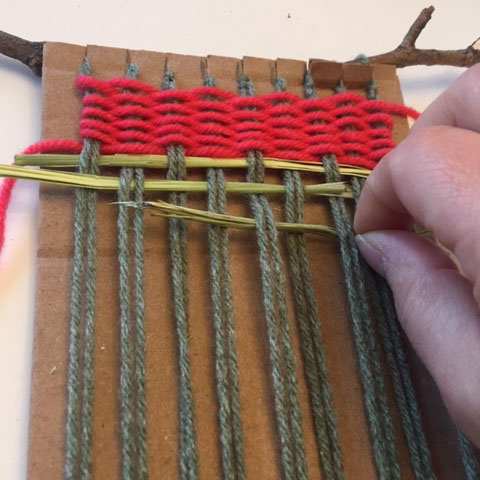
Using a different colored piece of yarn, start to weave, alternating under, over, under, over each piece of yarn on your loom. Tie a know to secure the end of your weaving yarn piece to the yarn in your loom. Add a small strip of tape to the other end of your weaving yarn piece to create a ‘needle’ to help with the weaving process.
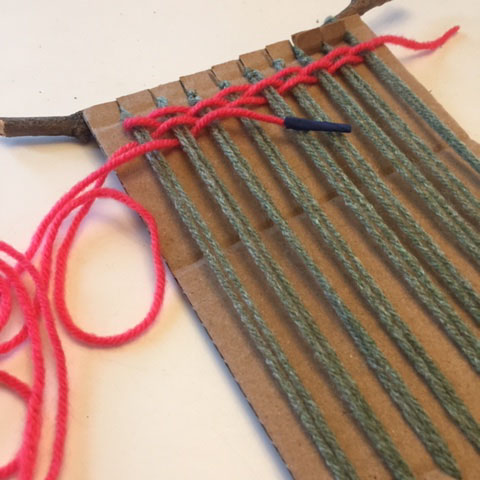
Use several different colors of yarn if you wish by tying the new color to the end of the first color. Continue to weave until you get to the bottom of the loom.
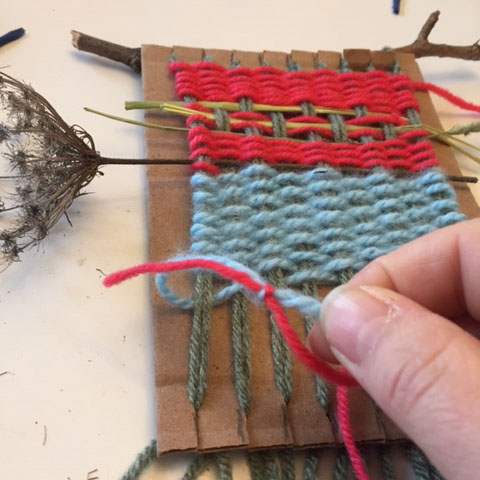
Add in the natural materials you collected such as feathers, small sticks, dried flowers or hay. Add the pieces as you go or wait until you reach the bottom of the loom and thread in your assorted materials.
Once you have completed weaving, tie a knot at the bottom of your loom, securing your weaving yarn piece to the last piece of yarn in your loom.

When you are finished carefully remove your weaving from the cardboard backing. Create a loop by tying a piece of yarn to the stick and hang your masterpiece!
Tips and tricks:
Get creative by using different items such as hangers, or embroidery hoops as your loom. Feeling ambitious? Assemble a giant weaving station outdoors by creating a square frame with sticks. Secure into the ground and add rope or twine to create a giant loom.
Working with younger weavers? Try creating a simple loom by wrapping yarn around an open hoop so it resembles a web. Embroidery hoops or small craft wreaths work great. Guide your young friends to thread in their nature treasures to create interesting patterns.
What masterpieces will you create?